In this post, I will describe how to install Nacos on the Kubernetes environment. This post requires you to have some basic Kubernetes knowledge and is not suitable for every beginner.
What is Nacos
Nacos is an open-source software provided by Alibaba, which can help you discover, configure and manage your microservices. it supports two major use cases, service registry and config service. Microservice can automatically and dynamically register in Nacos and get application configuration. for detailed information, you can check out from Nacos Official website
To use Nacos, I would recommend deploying Nacos on the Kubernetes cluster environment. This will keep Nacos high availability. you can find the official deployment document, in their demo, they are using NFS as persistent storage.
I will install 3-Pod Nacos Cluster on a single node of Kubernetes and use local PV as persistent storage in this post. it sounds wired indeed, but this was one of our project’s architecture.
Create Database and import SQL file.
You need to create the Nacos database and import an SQL file. there are many ways to do this. the simplest is using MySQL utilities. you can find the Nacos SQL file from GitHub
Create local folder
Create a local folder on the host as a persistent volume destination.
mkdir -p /data/gosysops/localpath-db/nacos/pv1
mkdir -p /data/gosysops/localpath-db/nacos/pv2
mkdir -p /data/gosysops/localpath-db/nacos/pv3
Create Storage Class
To create local volume, a StorageClass is needed. This kind of StorageClass doesn’t support dynamic provisioning. `WaitForFirstConsumer` is to delay volume binding until Pod scheduling.
kind: StorageClass
apiVersion: storage.k8s.io/v1
metadata:
  name: nacos-localpath-storage
provisioner: kubernetes.io/no-provisioner
volumeBindingMode: WaitForFirstConsumer
Note: Please ensure your Kubernetes has permission to access the host. The Kubernetes created by the RKE tool, you need to add the following into your `Cluster.yaml`
 kubelet:
   extra_binds:
     - "/data:/data"
Create PV
Create 3 Nacos PersistentVoume, – `nacos-local-pv1, nacos-local-pv1, nacos-local-pv3` ,change their name, path in the file respectively.
apiVersion: v1
kind: PersistentVolume
metadata:
  name: nacos-local-pv1
spec:
  capacity:
    storage: 5Gi
  accessModes:
    - ReadWriteMany
  persistentVolumeReclaimPolicy: Retain
  volumeMode: Filesystem
  storageClassName: nacos-localpath-storage
  local:
    path: /data/gosysops/localpath-db/nacos/pv1
  nodeAffinity:
    required:
      nodeSelectorTerms:
        - matchExpressions:
            - key: kubernetes.io/hostname
              operator: In
              values:
                - master01
Create Nacos deployment
This Yaml consists of three sections, Service, ConfigMap and Statefulset.
For Nacos Service, you will be able to define and update related ports.
ConfigMap: you can define database username, password, etc. in the yaml, I had added an extra field `mysql.host: mysql-0.mysql-ha`
Statefulset: there are 2 containers in the StatefulSet file, one is the init container, which is used to seek nacos other peers. the second pod is the nacos server. the affinity is commented out because Nacos is deployed on a single node. in the end, we assign a StorageClassName bound to the pod.
apiVersion: v1
kind: Service
metadata:
  name: nacos-headless
  namespace: gosysops-prod
  labels:
    app: nacos
  annotations:
    service.alpha.kubernetes.io/tolerate-unready-endpoints: "true"
spec:
  ports:
    - port: 8848
      name: server
      targetPort: 8848
    - port: 9848
      name: client-rpc
      targetPort: 9848
    - port: 9849
      name: raft-rpc
      targetPort: 9849
    ## 兼容1.4.x版本的选举端口
    - port: 7848
      name: old-raft-rpc
      targetPort: 7848
  clusterIP: None
  selector:
    app: nacos
---
apiVersion: v1
kind: ConfigMap
metadata:
  name: nacos-cm
  namespace: gosysops-prod
data:
  mysql.host: "mysql-0.mysql-ha"
  mysql.db.name: "nacos"
  mysql.port: "3306"
  mysql.user: "nacos"
  mysql.password: "nacos"
---
apiVersion: apps/v1
kind: StatefulSet
metadata:
  name: nacos
  namespace: gosysops-prod
spec:
  selector:
    matchLabels:
      app: nacos
  serviceName: nacos-headless
  replicas: 3
  template:
    metadata:
      labels:
        app: nacos
      annotations:
        pod.alpha.kubernetes.io/initialized: "true"
    spec:
      #affinity:
      #  podAntiAffinity:
      #    requiredDuringSchedulingIgnoredDuringExecution:
      #      - labelSelector:
      #          matchExpressions:
      #            - key: "app"
      #              operator: In
      #              values:
      #                - nacos
      #        topologyKey: "kubernetes.io/hostname"
      initContainers:
        - name: peer-finder-plugin-install
          image: nacos/nacos-peer-finder-plugin:1.1
          imagePullPolicy: IfNotPresent
          volumeMounts:
            - mountPath: /home/nacos/plugins/peer-finder
              name: data
              subPath: peer-finder
      containers:
        - name: nacos
          imagePullPolicy: IfNotPresent
          image: nacos/nacos-server:1.4.2
          resources:
            requests:
              memory: "3Gi"
              cpu: "500m"
          ports:
            - containerPort: 8848
              name: client-port
            - containerPort: 9848
              name: client-rpc
            - containerPort: 9849
              name: raft-rpc
            - containerPort: 7848
              name: old-raft-rpc
          env:
            - name: NACOS_REPLICAS
              value: "3"
            - name: SERVICE_NAME
              value: "nacos-headless"
            - name: DOMAIN_NAME
              value: "cluster.local"
            - name: POD_NAMESPACE
              valueFrom:
                fieldRef:
                  apiVersion: v1
                  fieldPath: metadata.namespace
            - name: MYSQL_SERVICE_HOST
              valueFrom:
                configMapKeyRef:
                  name: nacos-cm
                  key: mysql.host
            - name: MYSQL_SERVICE_DB_NAME
              valueFrom:
                configMapKeyRef:
                  name: nacos-cm
                  key: mysql.db.name
            - name: MYSQL_SERVICE_PORT
              valueFrom:
                configMapKeyRef:
                  name: nacos-cm
                  key: mysql.port
            - name: MYSQL_SERVICE_USER
              valueFrom:
                configMapKeyRef:
                  name: nacos-cm
                  key: mysql.user
            - name: MYSQL_SERVICE_PASSWORD
              valueFrom:
                configMapKeyRef:
                  name: nacos-cm
                  key: mysql.password
            - name: NACOS_SERVER_PORT
              value: "8848"
            - name: NACOS_APPLICATION_PORT
              value: "8848"
            - name: PREFER_HOST_MODE
              value: "hostname"
          volumeMounts:
            - name: data
              mountPath: /home/nacos/plugins/peer-finder
              subPath: peer-finder
            - name: data
              mountPath: /home/nacos/data
              subPath: data
            - name: data
              mountPath: /home/nacos/logs
              subPath: logs
  volumeClaimTemplates:
    - metadata:
        name: data
      spec:
        storageClassName: "nacos-localpath-storage"
        accessModes: [ "ReadWriteMany" ]
        resources:
          requests:
            storage: 5Gi
Deploy Nacos
After saving and applying the above files, you are able to see 3 nacos pods in Kubernetes by kubectl get pod

Access Nacos
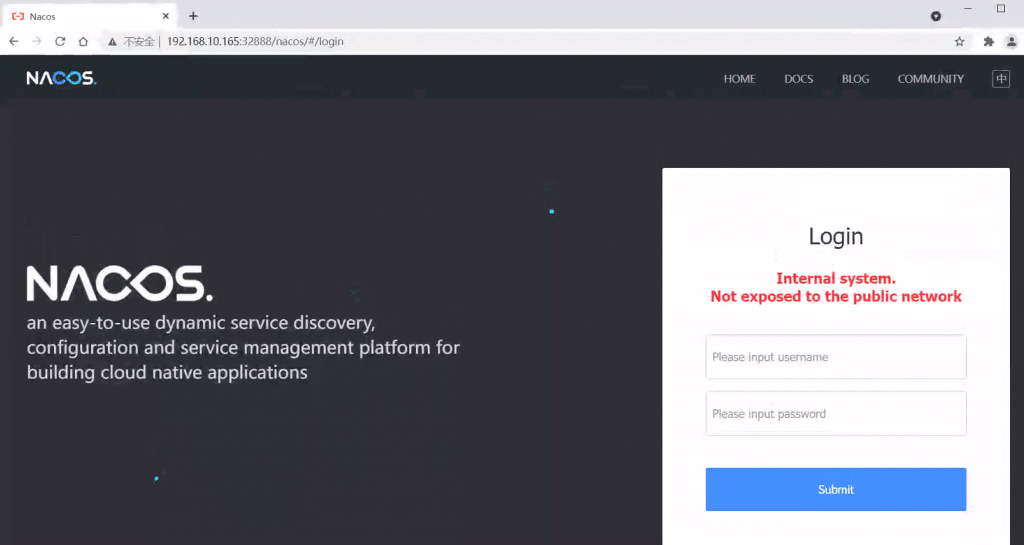
Two ways to access Nacos, Ingress and NodePort. In my internal environment, I created a new service called Nacos-headless-exposed and exposed port 32888 to access.

the default username and password is nacos

Summary
You have learned how to deploy the Nacos cluster on a single Kubernetes node and how to create local volume as persistent storage. I do not usually recommend using it this way. if the node fails, the Nacos cluster is meaningless.